Magic Mirror

You've probably seen magic mirrors like the above around the internet. You can make a very neat and customizable display by hiding a monitor behind a 2 way mirror and powering the display with a Raspberry Pi.
It's a very fun project and I learned quite a bit from building one for myself and one as a gift. I'll separate the software and hardware parts of the build for those who are only interested in one or the other.
Hardware: Materials
Once you have a monitor you will know what size housing you need to build. The rest of the materials needed are:
- RaspberryPi 3b (with power supply, case for pi)
- 2 plug power strip
- Angle brackets to secure the monitor
- Wood for the housing
- Fan for ventilation
- Small furniture pads
- Velcro for securing pi
- Picture hanging fastener/hanging cable
- 2 way mirror: This is one of the most expensive parts of the project. I tried ordering a cheap acrylic mirror from Amazon but the first and second one I got were cracked. I had much better luck with TAP Plastics, their mirrors are very high quality acrylic and each of mine cost ~$60. You can get actual glass if you want (it looks very nice) but it will cost more than acrylic
Wood considerations
For my first magic mirror I used pine because it was cheap. This is fine if you want to paint it or want a light stain, but pine does not take dark stains well at all.For my Mom's magic mirror I used oak and had much much better results with staining, so be sure to pick a wood that will work well for the finishing that you have in mind.
Hardware: Building the frame
Shout out to the Dallas Maker Space where I put this together. If you're in DFW and need a place to do handy work like this they have a wonderful workshop. They have all the tools you could ever need for woodworking, welding, laser cutting, electrical work...etc. Great place with very smart people.
Back to the project.
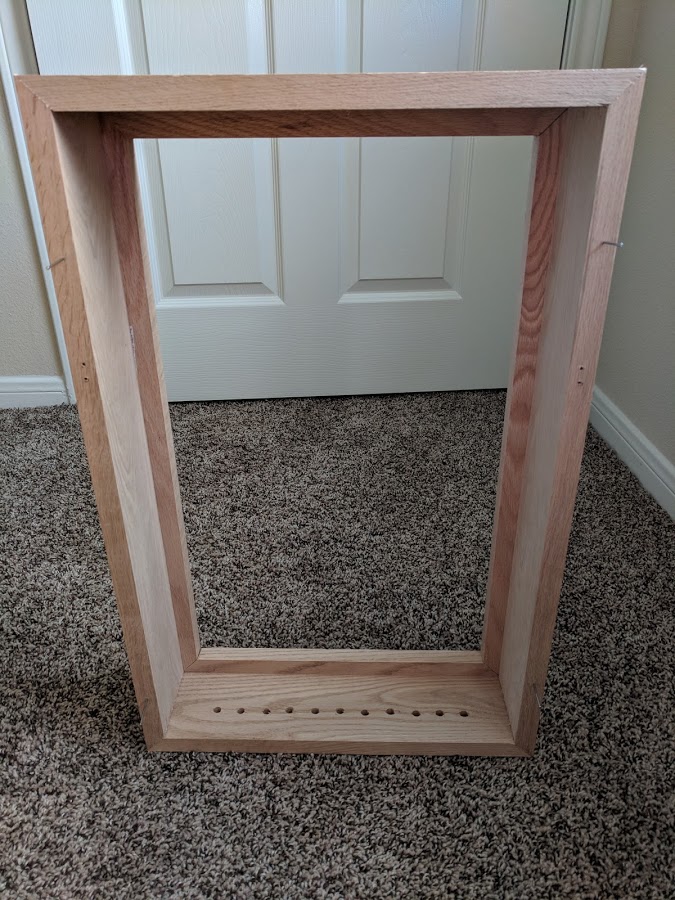
The main features of the housing that I want to highlight are the ventilation holes on the bottom and the ventilation square on the top.
My first magic mirror was running very hot with just the holes in the bottom, so I added a hole in the top and picked up some small fans to fasten to the hole and that helped tremendously.
Always a good idea to do a "dry fit" to make sure the monitor fits how you want it to before staining/painting. Below is my picture of the first time I put the monitor in the housing. Good fit! I could have made it a little smaller but this is fine.
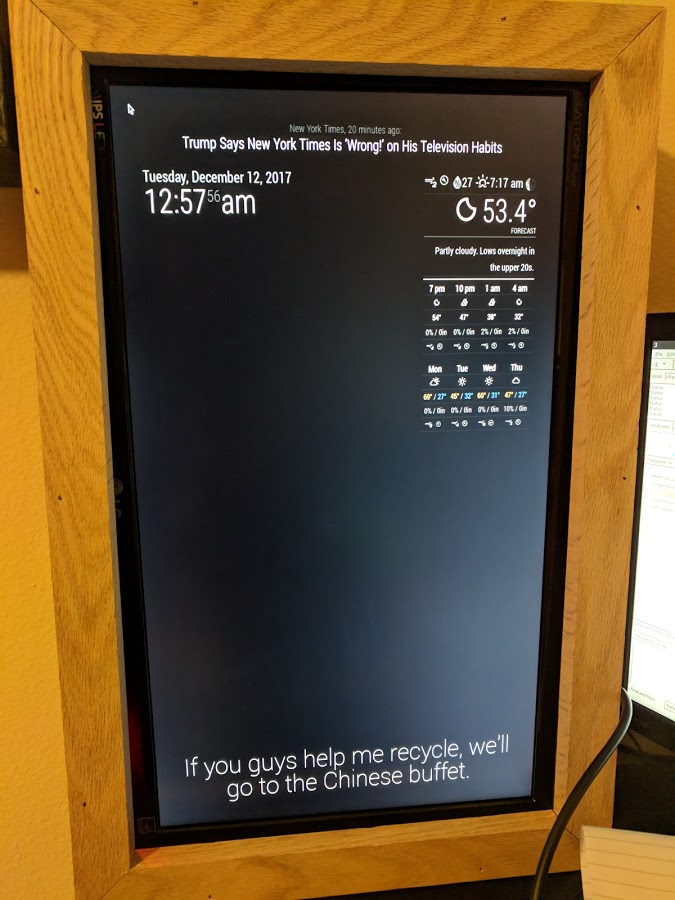
On my first attempt at a magic mirror made the box to small and ended up breaking the monitor trying to force it into place. On the next attempt I made the box too big, and although it still works just fine you can definitely see where the monitor ends inside the box, and I had to add spacers to keep the monitor in the center.
For these reasons it can be a good idea to make your cuts very careful, allow one-half to one inch of extra space on your measurements and measure the box before you nail/glue/screw anything together!
Hardware: Sanding, staining
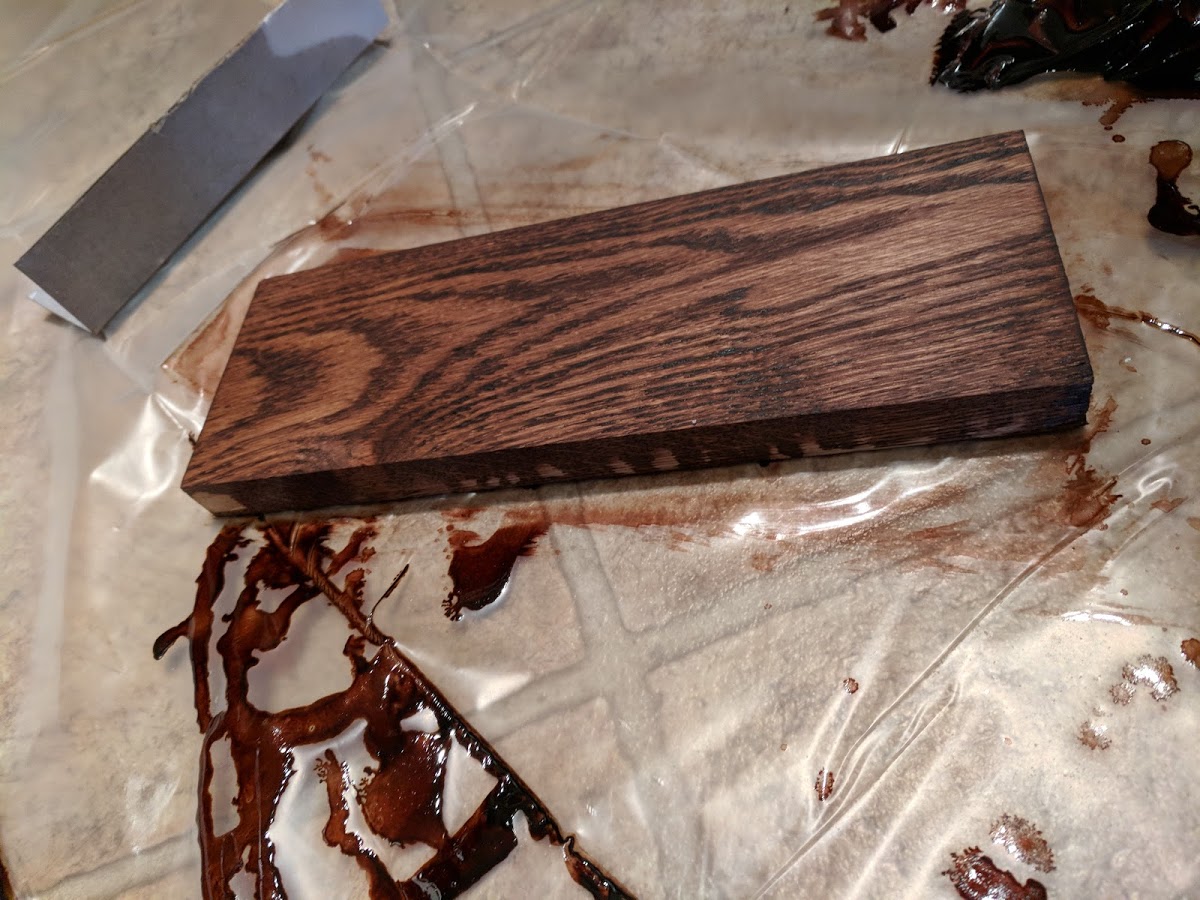
You do NOT want to go to the trouble of buying, cutting, assembling, and staining your housing just to find that it's not the color you want. This way I was able to see how many coats of stain I needed and what the polyurethane finish I had chosen would look like.
I liked how the sample looked, so then it was time to stain the real thing!
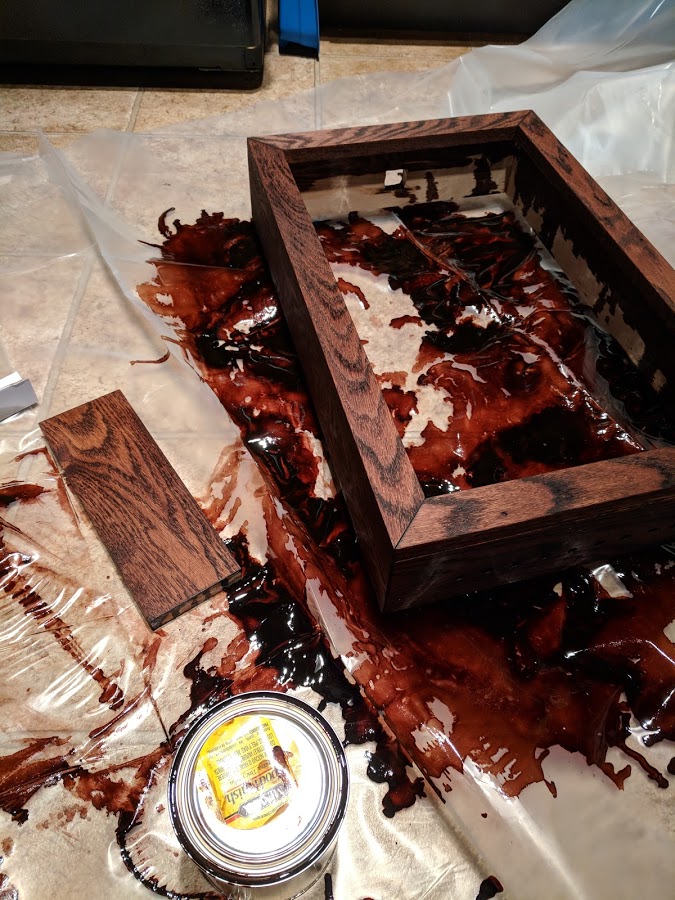
I highly recommend laying down some durable plastic (two or more layers, if possible) when staining. It is cheap, protects your floor, and you can throw it away when you are done.
For easy staining I like to tap 4 small nails into the back of the mirror. This way you can stain the mirror while it "stands up" on the nails and it's much easier to get the bottom edge. The stain can also drip off instead of congealing against the plastic, so you'll get a smoother product.
Those nails can poke through the plastic though! Which is why using multiple layers of plastic is important. If you really wanted to you could lay some cardboard in between two layers of plastic, so the nails stop there and any leak-through stain doesn't get to the floor.
I would also suggest applying some stain to the inside edge of the frame where the mirror will be. The reason is that if there is any gap between your mirror and the frame, the mirror will reflect anything that isn't dark! This happened with my first mirror and if you look just right you can see the patches of the wood I didn't paint because the acrylic mirror does not sit flush. This is easy to hide if everything is dark, however.
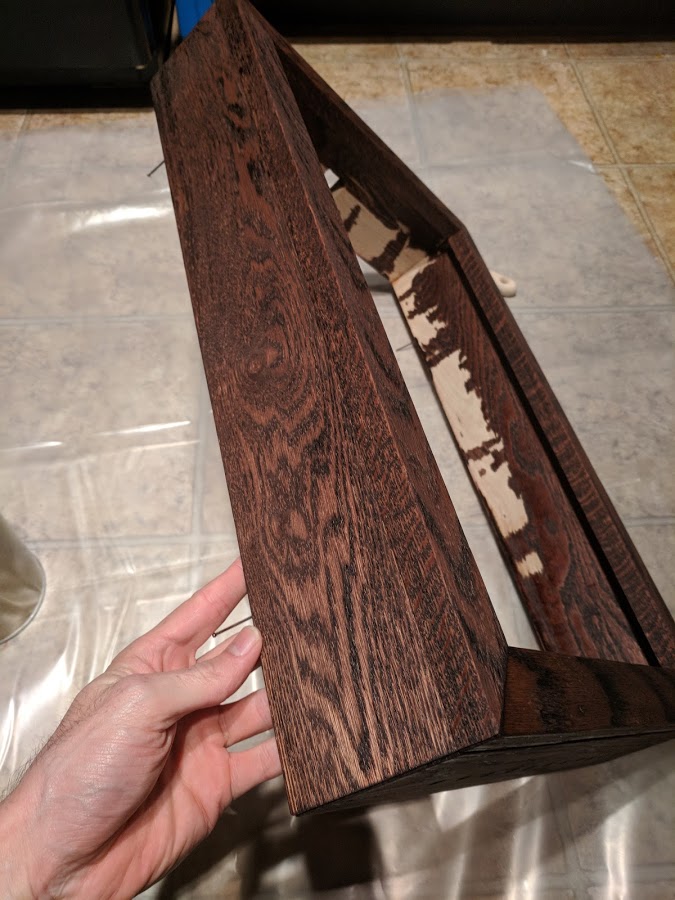
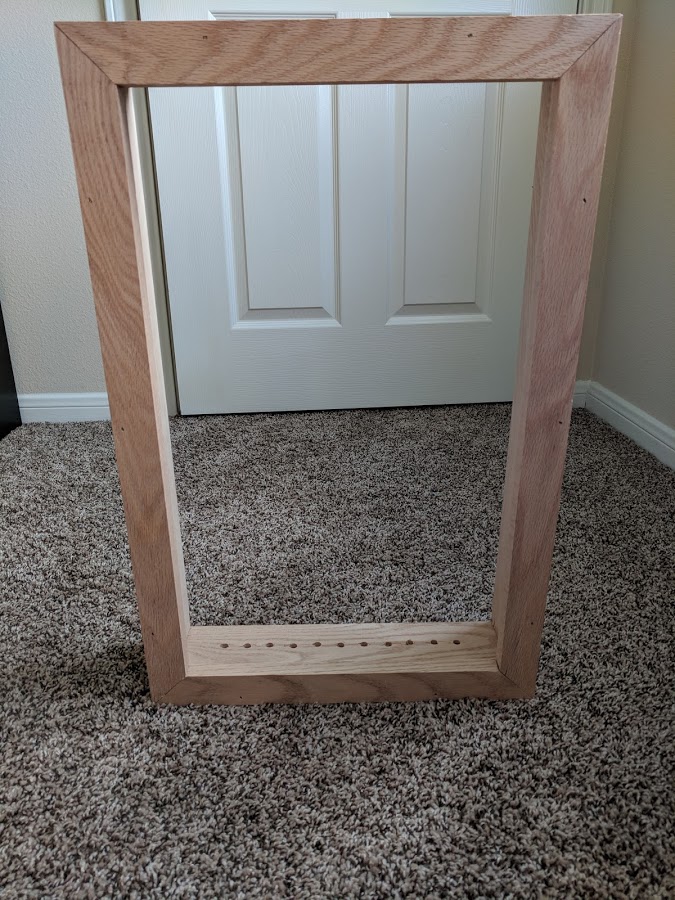
Not bad wood working for a programmer! The stain did look a little light light before I put on the polyurethane, but that finishing coat did wonders to give it a more deep/soft/almost wet look. Having a sample piece to test everything out is critical to know what you'll end up with!
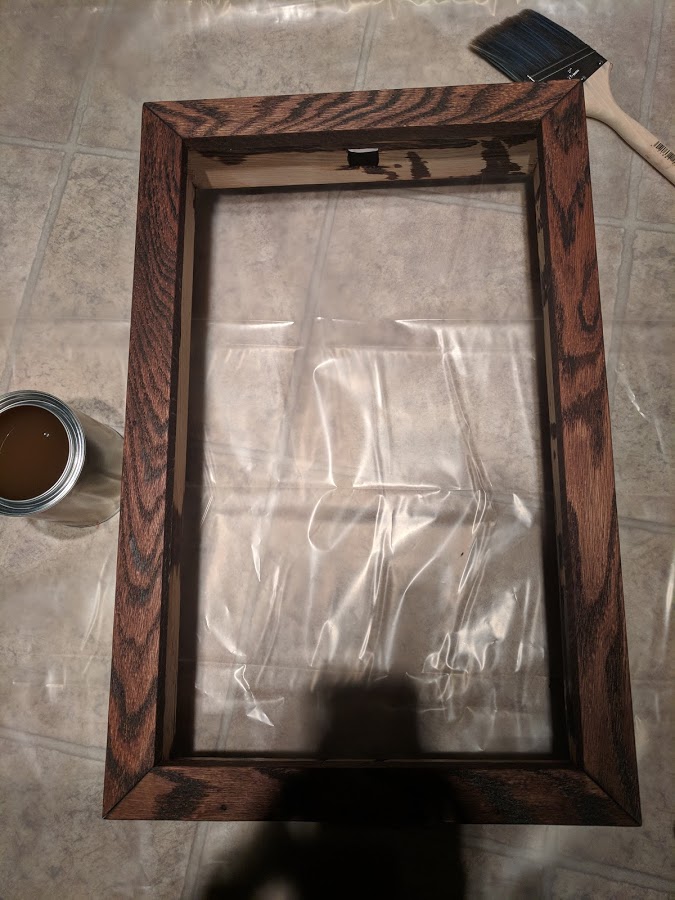
You can see the hole in the top of the image where I'll put the fan. I definitely recommend cutting this hole and the holes in the bottom of the mirror BEFORE any staining/finishing work. I didn't think I would need ventilation holes on my first mirror so I had to cut/drill these holes after it was painted...poor choice. Learn from my mistakes! My second mirror went much smoother after learning that lesson.
Hardware: Assembly
Next I put the two way mirror in place and the monitor on top of it. If you get the fit pretty close you don't need to secure the mirror because you can install the angle brackets and the monitor will hold the mirror in place.
With the monitor secured we can now install the other parts.
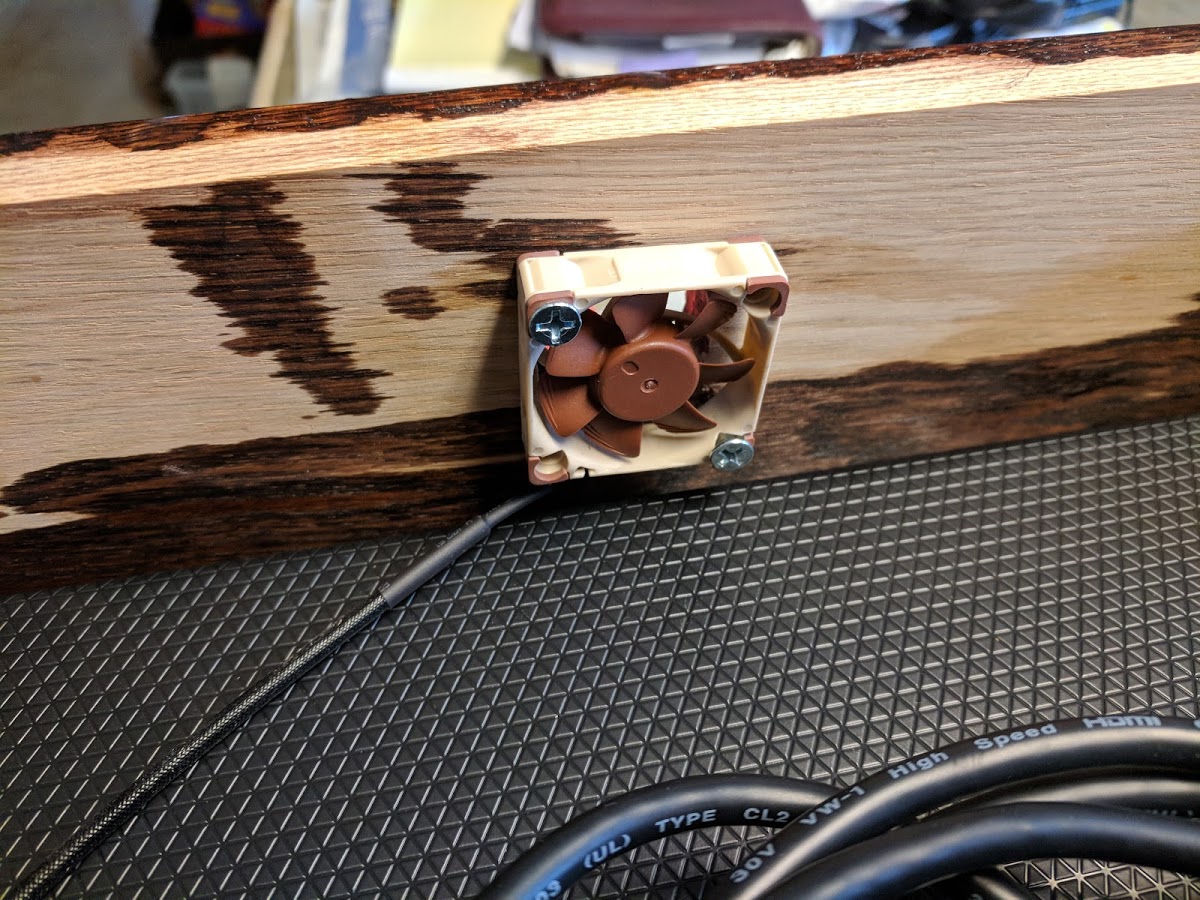
Here we have the fan at the top of the box. It is powered directly from the RaspberryPi and I just used two small screws to hold it in place. The Noctua A-Series Cooling Fan comes with the adapter you need to work with the Pi and moves lots of air for its size.
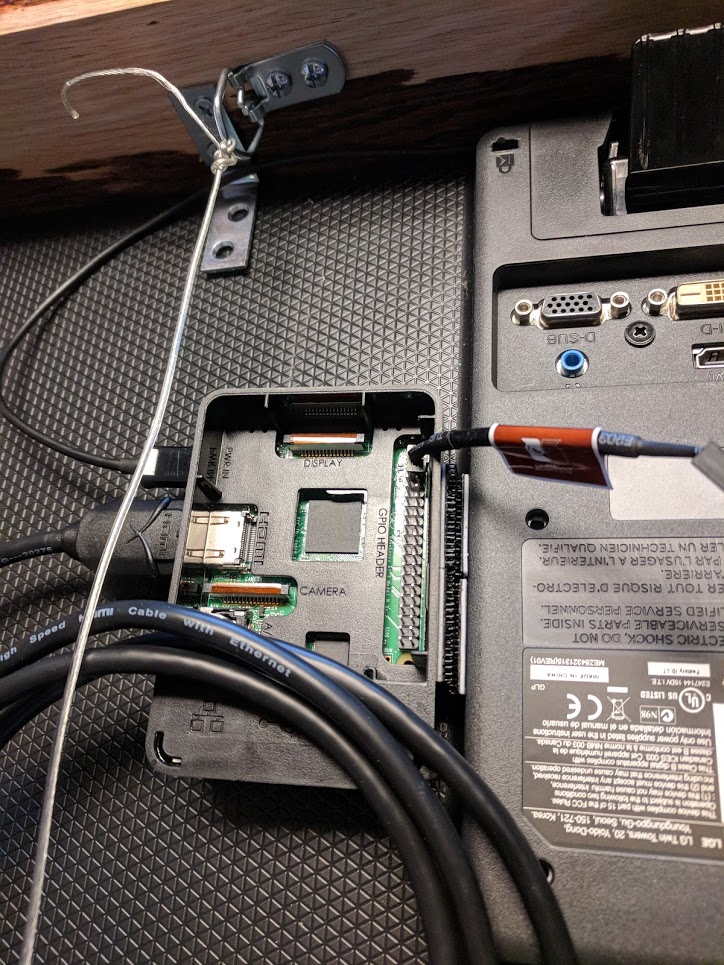
Next we can put the Raspberry Pi in its case. I like using small velcro pads so I don't need to drill holes and I can remove the Pi easily if I need to. They are very strong and you can attach them to the monitor however you need to.
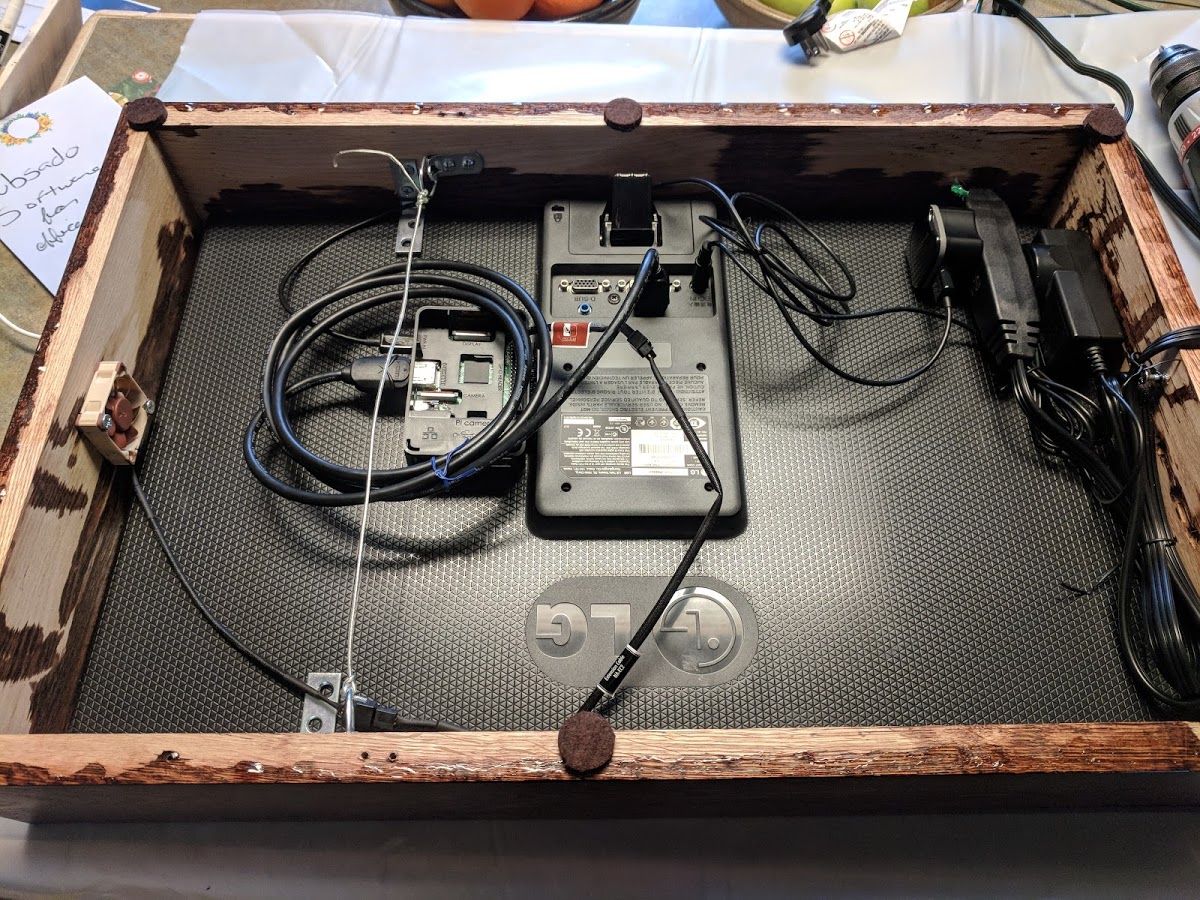
From there you can:
- Secure the power strip to the inside of the box
- Run power to the monitor and the pi
- Install your frame hanging hardware of choice
- Add furniture pads to the edge of the mirror.
Finished product:
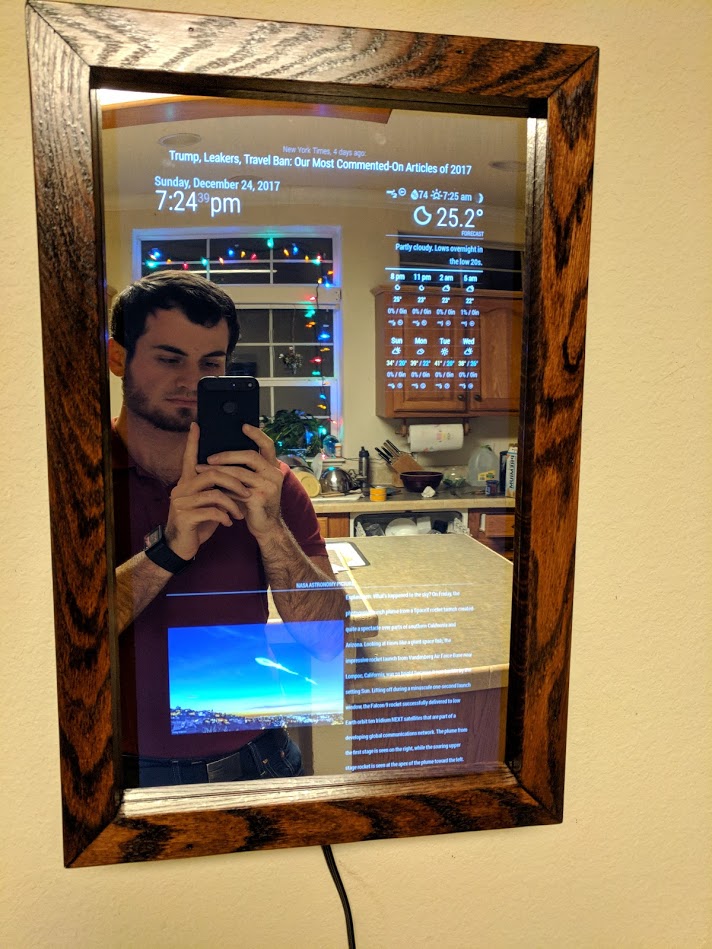
Overall I'm very pleased with how this mirror turned out. I'll definitely use this wood/stain combo for my next mirror.
So enough pretending to know woodworking. Let's talk about software!
Software: Imaging RaspberryPi, installing Magic Mirror software
Let's talk about some of the custom software I made for these projects.
Software: Portfolio Projections module
- Write a web scraper that logs into my investment accounts and parses out the actual balance
- Record how many shares of each stock I have and use Yahoo Finance or a similar API to check the price every few seconds for an up-to-date portfolio snapshot.
- Use a compounding interest with recurring contribution formula to compute future values based off of an initial principle, growth rate, and contribution amount
The second approach is better but there's the problem of recurring contributions. Each time part of my paycheck goes to my 401k, the amount of shares I get depends on the current stock price of the security. That would be a major pain to track over time, as the future account balance would be the sum of all share purchases * the current stock price.
That leaves us with the third option. It's less accurate but much easier to implement. And I actually like that I can give it conservative parameters and then be surprised when my investments outperform the Magic Mirror's estimates.
So how about that math? I found the formulas I needed off of thecalculatorsite.com, they are below:
Compound interest for principal:

P(1+r/n)^(nt)

Future value of a series:

PMT × (((1 + r/n)^(nt) - 1) / (r/n)) × (1+r/n)

Where:
A = the future value of the investment/loan, including interest
P = the principal investment amount (the initial deposit or loan amount)
PMT = the monthly payment
r = the annual interest rate (decimal)
n = the number of compounds per period (months, years, etc)
t = the number of periods (months, years, etc) the money is invested or borrowed for
Okay, so what do I need to use that formula?
- Principle: My account balance at some arbitrary start date
- Start date: The timestamp for the balance above (we need this to know how much time has passed when we recompute the balance later)
- Annual interest rate: I assumed a modest annual growth rate of 8%. This is not unrealistic with the Boglehead Investing approach I take. Definitely read up on it if you're tired of paying managed accounts to lose your money!
- Recurring contributions: Or how much of my paycheck goes to the 401k each pay period
- Compound frequency: How often to compound interest
I really like this module because every few seconds it re-does the math and shows the balance growing by a few cents at a time. This is not exactly realistic, since it actually grows more like a step function with biweekly contributions, but it's way more fun to feel like I'm earning money by staring at my mirror. Here's a real-time screen capture:
Disclaimer: No, those numbers are not accurate. I made up some parameters just to illustrate how the refresh looks cool. Stop being nosey about my portfolio :P
I also have it compute the future balance for several time steps in the future. This is also fun to have because it illustrates the power of compounding interest and reminds me of the financial independence all of this is working towards.
Here's a screenshot from my mirror.
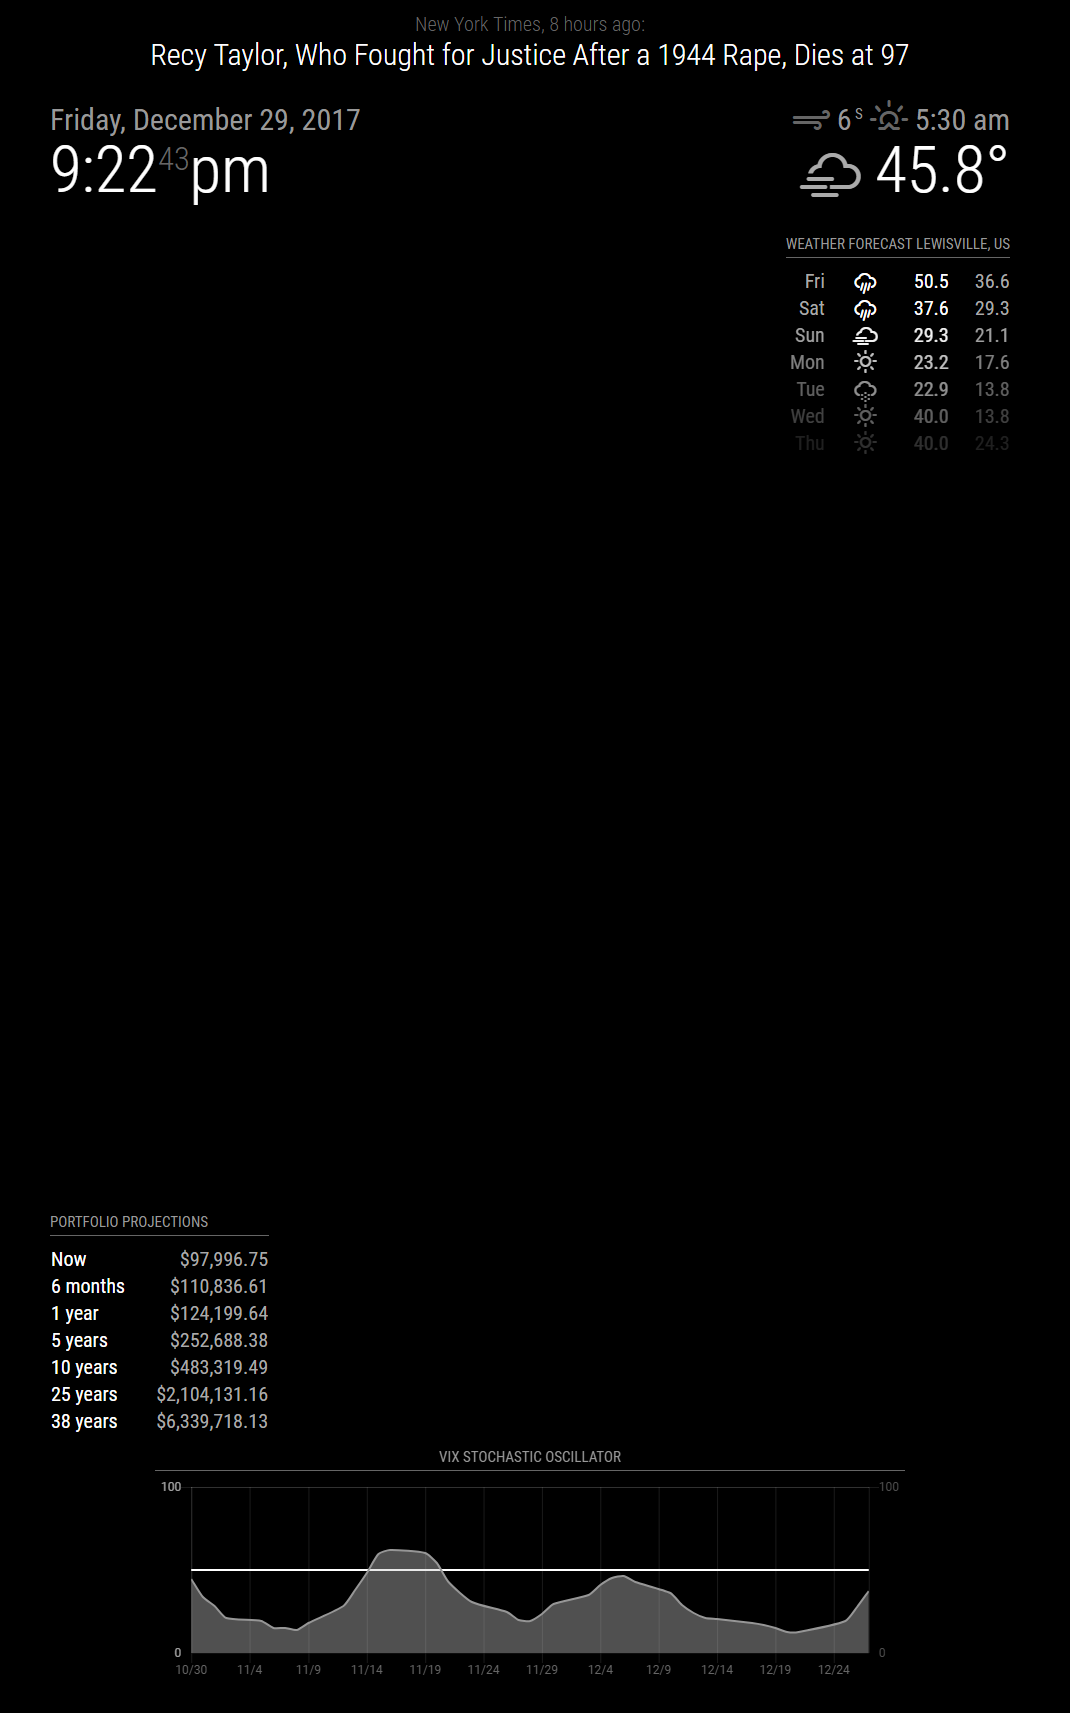
Software: VIX Stochastic Oscillator Graph
Without ranting too much about investing, I wanted to dabble in some technical analysis of stock options and I added this module so I could see when the market was getting volatile and conducive to stock option plays.
To supply this graph with data I just added another little node server on the pi. Whenever the auxiliary server gets a request from MMM-Chart, it loads up the latest VIX data from yahoo finance and uses the technicalindicators npm module to compute the stochastic oscillator. These points are then returned via JSON and the MMM-Chart library can do its thing!
Software: NASA APOD Fork
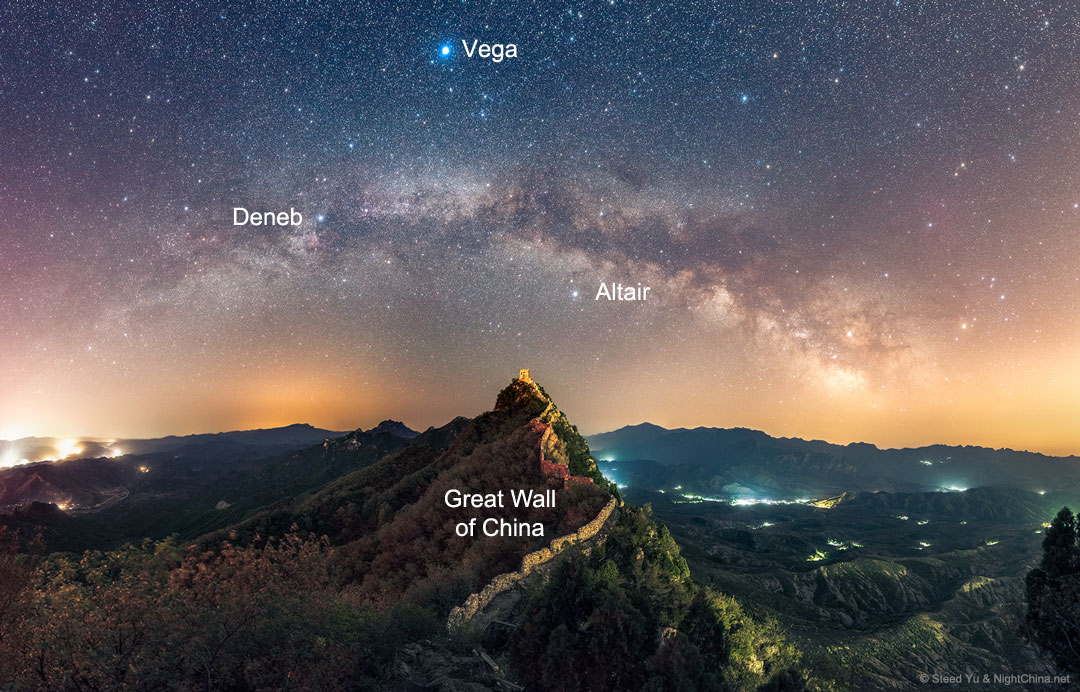
The NASA APOD website is nice though because it also gives an explanation of the image, i.e. for the one above we have the following message:
Explanation: Have you ever seen the Summer Triangle?

The bright stars Vega, Deneb, and Altair form a large triangle on the sky that can be seen rising in the northern spring during the morning, and rising in the northern fall during the evening.

During summer months, the triangle can be found nearly overhead near midnight as three of the brightest stars on the sky.
Featured here, along with the arch of the central band of our Milky Way Galaxy, the Summer Triangle asterism was captured this spring over the Great Wall of China.

This part of the Great Wall, a World Culture Heritage Site, was built during the 6th century on the Yan Mountains.

At the summit is Wangjinglou Tower from which, on a clear night, the lights of Beijing are visible in the distance.

Tomorrow's picture: celestial fireworks
Since I wanted my mom's mirror to show each day's picture with the corresponding explanation, I forked MMM-nasaastropic to add the explanation to the module so it wasn't just a picture.
The main code change I had to make was in the node_helper.js file which requests the NASA APOD web page and parses out the image URL. The only problem is that the NASA APOD webpage does not put the explanation text in a div with unique id that I could grab with jQuery.
To make matters worse, the explanation can be more than one paragraph so I couldn't just get the <p> tag either.
I'm not proud of the solution I found, but it does work because of the following observations:
- The explanation always starts with the bold text "Explanation"
- The explanation is always followed with bold text, sometimes "Tomorrow's picture", sometimes "Explore the Universe", sometimes other text, but ALWAYS BOLD.
var regex = /<b>[\s\S]?Explanation:[\s\S]*?<\/b>([\s\S]*?)<b>/g;Ew. I know.
Definitely not ideal, but it does work for all the test cases I threw at it.
The code is below if anyone is interested. You can clone the whole repo from github if you want this module for your own magic mirror. Thank you to NASA for the awesome APOD web page!
retrieveAndUpdate: function() {
var self = this;
request(URL, function (err, response, html) {
let $ = cheerio.load(html);
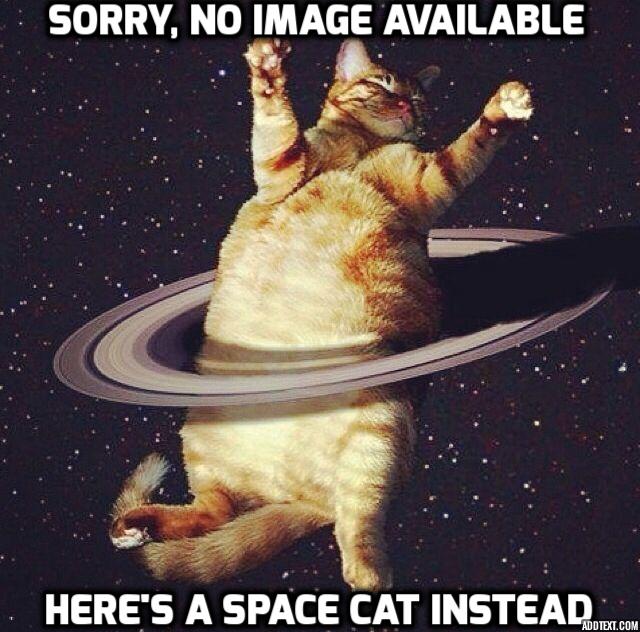
// If no picture available (happens when NASA posts a video instead) show a random cat picture instead
if ($('img').attr('src') == undefined){
var num = Math.floor((Math.random() * 5) + 1);
var img_src = "MMM-nasaastropic/cat" + num + ".jpg";
}else{
var img_src = IMG_PREFIX + $('img').attr('src');
}
var text = $("body").html();
// Please forgive me programming gods
var regex = /<b>[\s\S]?Explanation:[\s\S]*?<\/b>([\s\S]*?)<b>/g;
var match = text.match(regex);
var explanation = match[0];
explanation = $(explanation).text();
self.sendSocketNotification('URL', [img_src,explanation]);
});
}
Oh, and sometimes the module won't find an <img> tag because NASA embedded a video instead, so I added some error handling and show a random cat meme like the following when that happens: